
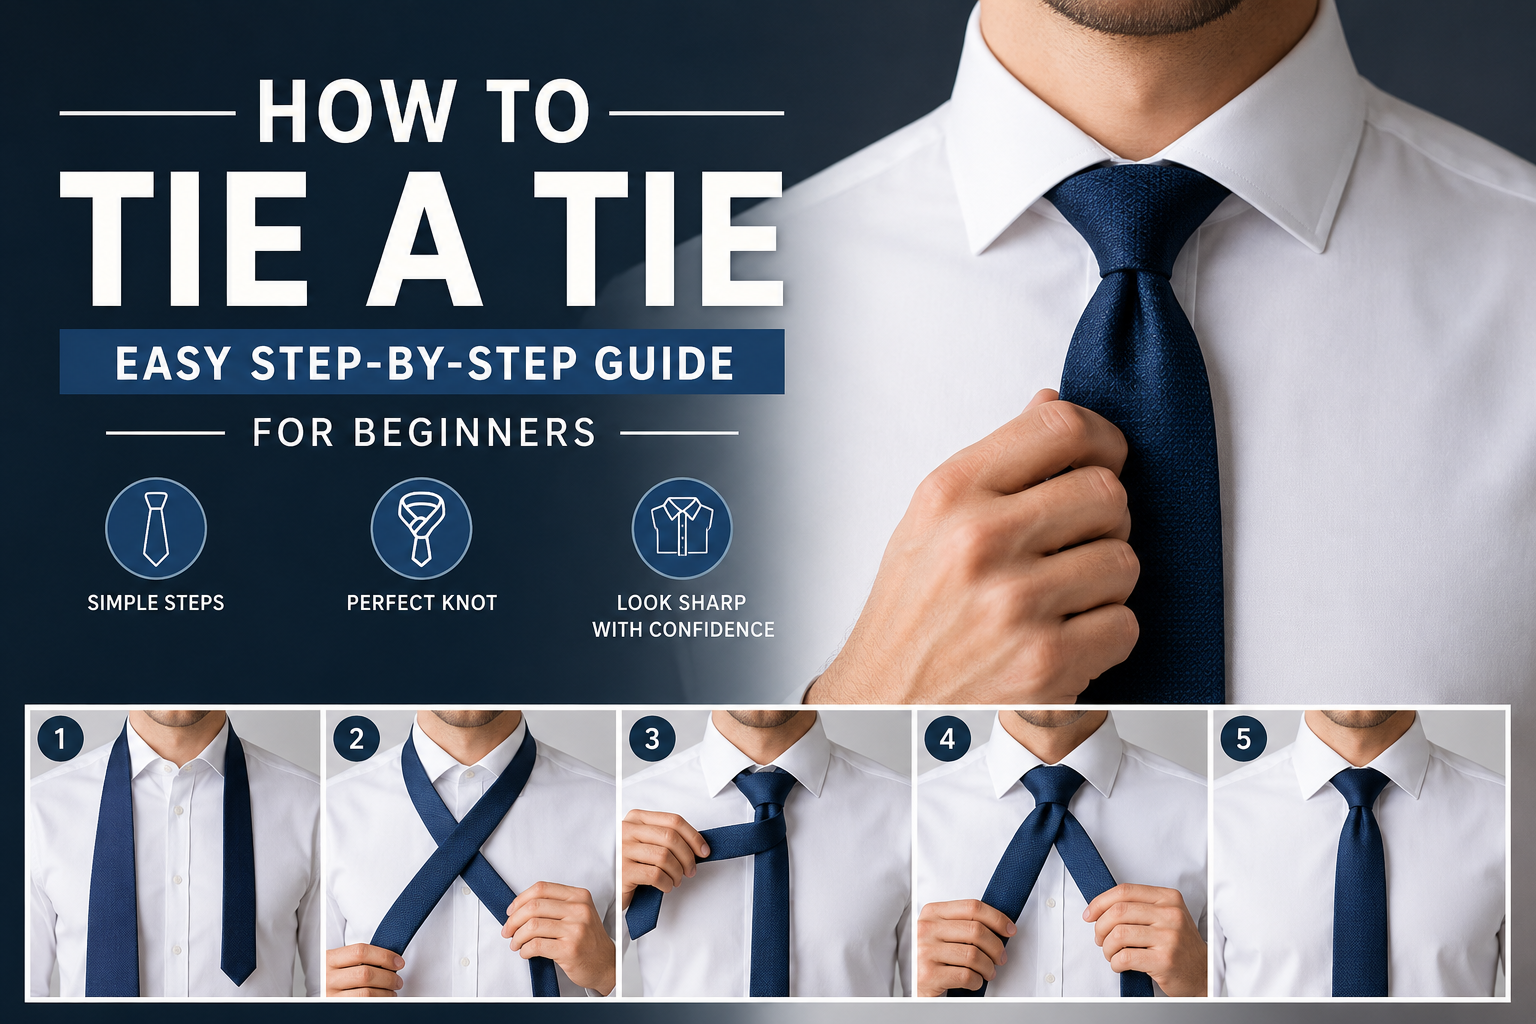
How to Tie a Tie
Knowing how to tie a tie is one of those small, timeless skills that still pays off in 2026 — whether you’re heading into a job interview, a wedding, a client pitch, or a video call where the camera only shows you from the chest up. A clean knot takes seconds once you’ve practiced it, and it instantly makes an outfit look intentional. This guide breaks down the most beginner-friendly knot, the Four-in-Hand, walks through it step by step, and covers when to reach for a different knot, what usually goes wrong, and how to fix it.
The Basic Anatomy of a Tie
Every necktie has two ends: a wide blade in front and a narrow blade behind it. The wide end does almost all the moving during the tying process, while the narrow end barely shifts. Once you can tell the two apart at a glance, following any set of tying instructions becomes much easier.
Length matters just as much as technique. A well-tied tie should land right around the middle of your belt buckle. Fabric weight, tie width, and even the cut of your shirt collar can all change how the finished knot sits, so it’s worth adjusting your starting position rather than assuming one length works for everyone.
- The wide end should start noticeably lower than the narrow end before you begin.
- A finished tie should reach the center of your belt buckle — not above, not below.
- Taller people generally need more starting length on the wide end; shorter people need less.
- The Four-in-Hand knot can typically be learned in a handful of practice attempts.
How to Tie a Tie: The Four-in-Hand Knot
The Four-in-Hand is the go-to knot for most people because it’s quick, forgiving, and works with almost any collar. It produces a slightly narrow, slightly asymmetrical knot — a look that reads as relaxed rather than stiff, which is part of why it remains the default recommendation for everyday dressing.
- Drape the tie around your neck. Let the wide end hang noticeably lower than the narrow end, with the seam facing inward so the front stays smooth and visible.
- Cross the wide end over the narrow end. Bring the wide end across the front to form an “X” just below your collar, and hold the crossing point steady with one hand.
- Wrap the wide end around. Pass the wide end behind the narrow end, then bring it back across the front. This wrap is what gives the knot its shape, so keep the fabric flat as you go.
- Pull the wide end up through the neck loop. Guide it upward from underneath, then feed it down through the loop you just formed at the front. Pull gently rather than cinching it tight right away.
- Tighten and adjust. Slide the knot up toward your collar while easing the wide end into place. It should feel snug but comfortable, not choking.
Windsor Knot vs. Four-in-Hand: Which Should You Use?
Neither knot is objectively better — they’re suited to different collars and different levels of formality. Picking the right one is about matching the knot’s size to your shirt and the occasion.
| Knot | Best For | Collar Type | Difficulty |
|---|---|---|---|
| Four-in-Hand | Everyday wear, office, casual formal events | Narrow to medium spread | Easiest |
| Windsor | Weddings, interviews, presentations, formal photos | Wide spread collars | Moderate |
Common Mistakes — and How to Fix Them
Almost every tying mishap falls into one of three categories: wrong length, an off-center knot, or twisted fabric. The good news is that all three are quick to correct once you know what to look for.
Tips for a Sharper Finish
- Match knot size to collar: narrow collars suit the Four-in-Hand, wide-spread collars suit the Windsor.
- Always tuck the narrow end out of sight behind the wide end.
- Check your length in a mirror before heading out — small height differences change the ideal starting point.
- Add a dimple below the knot for a more tailored, deliberate look.
- Give the tie a light steam or hang it up overnight if it looks creased from storage.
Frequently Asked Questions
Final Thoughts
Tying a tie well isn’t about mastering a complicated technique — it’s about repetition and a few small habits: the right starting length, a steady crossing point, smooth fabric, and a centered knot. Start with the Four-in-Hand, get comfortable with it, and branch out to knots like the Windsor once you want more variety for formal occasions.